Hello Folks,
I know their a way to use mach 3 to mark the pierce points. To drill thick metal I tried a search but didn't find any thing.
I remember beefy talking about this some time back and found his post on it but it didn't really tell me how to do it.
Any help would be appreciated.
Thanks, Danny
marking pirece points
-
danny
- 2 Star Member

- Posts: 53
- Joined: Sun Jun 24, 2012 5:39 pm
marking pirece points
2X2 Shop built table,proma thc,TB6560 bob
TD cut master 52,SL 100 machine torch
mach3, sheetcam, 26cfm compressor, Ref.air dryer, water seperator, motorguard toilet paper filter
TD cut master 52,SL 100 machine torch
mach3, sheetcam, 26cfm compressor, Ref.air dryer, water seperator, motorguard toilet paper filter
-
acourtjester

- 6 Star Elite Contributing Member

- Posts: 8134
- Joined: Sat Jun 02, 2012 6:04 pm
- Location: Pensacola, Fla
Re: marking pirece points
If I remember right Jim Colt stated this is not good for the consumables as it would effect the number of total starts.
There was a guy in Australia that had a video showing that method and was working on an add on control to do it. That was maybe a year ago nothing since??
There was a guy in Australia that had a video showing that method and was working on an add on control to do it. That was maybe a year ago nothing since??
DIY 4X4 Plasma/Router Table
Hypertherm PM65 Machine Torch
Drag Knife and Scribe
Miller Mig welder
13" metal lathe
Small Mill
Everlast PowerTig 255 EXT
Hypertherm PM65 Machine Torch
Drag Knife and Scribe
Miller Mig welder
13" metal lathe
Small Mill
Everlast PowerTig 255 EXT
-
beefy
- 4.5 Star Member

- Posts: 1503
- Joined: Fri Jan 18, 2013 3:19 am
Re: marking pirece points
That was me, I was making a circuit board for marking hole centres. THOUGHT I had created a great product and was going to make myself a little pocket money, but no-one gave a tossacourtjester wrote:If I remember right Jim Colt stated this is not good for the consumables as it would effect the number of total starts.
There was a guy in Australia that had a video showing that method and was working on an add on control to do it. That was maybe a year ago nothing since??
https://www.youtube.com/watch?v=yg-s-EAqMfI
I asked Jim about the effect of life on consumables and from what I can remember (correct me Jim if I say it wrong) Jim said a quick "blip" from the torch has about the same detrimental effect as a pierce. He said it is not the length of time the consumables are "active" that wears them out so much, it is the sudden change from doing nothing to being at operating temperature. So basically I consider one torch "blip" when I mark a crater to be the equivalent as one pierce as far as consumable wear goes. No, actually I consider it less wear because you haven't got all the sparks and molten metal flying everywhere. In the Youtube video I was cutting out my slats for the table and marking the hole centres at the same time. After that I cut out all my "shark tooth" slat toppers and marked the corresponding hole centres in them too. That was a total of 768 hole centre marks + cutting, all from one Finecut nozzle and electrode. Am I worried about the effect on consumable life ??? not at all, I get my moneys worth. One electrode was a small price to pay for all those accurate hole centre marks. Thumbs up for Hypertherm. Many people do an actual pierce to mark a hole centre, that is certainly more torturous to consumables that a quick "blip", but for some reason there's not much negative stuff said on that method. Another advantage to a quick blip is that the sparks fly out sideways, not up. It is only when the crater starts turning into a deeper hole that the sparks are forced to do a u-turn and start flying upwards (i.e. back at the nozzle) instead of just outwards. So overall I feel like my idea for marking hole centres by a quick blip from the torch got a lot of un-deserved bad press.
Danny,
what most people seem to do (if they have Sheetcam) is put all the holes on a separate layer (in Sheetcam). For that "holes" layer they use a DRILL operation instead of a plasma operation BUT you use a plasma tool within that drill operation. Within the drill operation there are a couple of boxes for minimum and maximum hole size. Make sure the minimum hole size is less than your smallest hole, and the maximum hole size is larger than your biggest hole. In the plasma tool settings make the cut height and pierce height the same. Try zero pierce delay and see if your torch still fires, if it doesn't you may need to add a short pierce delay in.
If your plasma cutter has a post cut airflow, e.g. my Hypertherm has air coming out for 10 seconds after the torch has switched off, then you may need to wait for that airflow to stop before you can do another hole mark. WHY - you are trying to send a short duration "on" signal to the plasma cutter. If the post cut airflow is still on, when the plasma cutter recieves a "fire" command it must stop the air flow, wait for the electrode to re-contact the nozzle, and then create a new arc. The "fire" signal from the PC can have been and gone while that is happening and you get no arc. To get around this you can put a delay in the "Pause at end of Cut" in your plasma tool.
One more tip which will no doubt NOT be endorsed by Hypertherm. Leaving the ground lead disconnected really helped me in getting a smaller crater mark in the top of the steel.
Other guys may have different methods, but I hope the above helps you out.
Keith.
2500 x 1500 water table
Powermax 1250 & Duramax torch (because of the new $$$$ync system, will buy Thermal Dynamics next)
LinuxCNC
Sheetcam
Alibre Design 3D solid modelling
Coreldraw 2019
Powermax 1250 & Duramax torch (because of the new $$$$ync system, will buy Thermal Dynamics next)
LinuxCNC
Sheetcam
Alibre Design 3D solid modelling
Coreldraw 2019
-
Brand X
- 3.5 Star Member

- Posts: 511
- Joined: Wed Apr 23, 2014 2:48 pm
Re: marking pirece points
I put 20/30 amp(Unshielded) consumables in my Esab Powercut 1600 for marking holes ,turned the power to 15 amps, and had nice results. Put a pause in the programing to allow me to change the amperage, or consumables. I used the drill program in SheetCam. Very simple and easy to setup..  I punched the holes afterwards, and they came out perfect.
-
jimcolt
- 5 Star Elite Contributing Member

- Posts: 3087
- Joined: Mon Jul 20, 2009 11:18 pm
- Location: North Carolina
Re: marking pirece points
The Plasmacam software has a pierce point timer that works very well. It times the same regardless of whether the torch is in post flow or not.....as it starts the timing based on electrical current flow to the material (sensed through the work ground)
As far as consumable life....you will get essentially the same number of starts (with a Hypertherm) doing piece points as you would if you were piercing all the way through. Likely only the electrode will be affected....so getting 750 or more pierce points for less than $5.00 seems pretty cheap to me.
Jim Colt
-
tnbndr

- 4.5 Star Elite Contributing Member

- Posts: 1688
- Joined: Mon Jan 09, 2012 4:30 pm
- Location: New Berlin, WI
- Contact:
Re: marking pirece points
If you have a scribe, you could use that to mark the centers also. That is my plan anyway, even thought LDR setup a drill point tool in Sheet Cam for me. I may try it when needed just to see if it works.
Dennis
LDR 4x8, Scribe, DTHCIV
Hypertherm PM45, Macair Dryer
DeVilbiss Air America 6.5HP, 80Gal., 175psi, Two Stage
16.9scfm@100psi, 16.0scfm@175psi
Miller 215 MultiMatic
RW 390E Slip Roll (Powered)
AutoCAD, SheetCAM, Mach 3
http://ikescreations.com
LDR 4x8, Scribe, DTHCIV
Hypertherm PM45, Macair Dryer
DeVilbiss Air America 6.5HP, 80Gal., 175psi, Two Stage
16.9scfm@100psi, 16.0scfm@175psi
Miller 215 MultiMatic
RW 390E Slip Roll (Powered)
AutoCAD, SheetCAM, Mach 3
http://ikescreations.com
-
danny
- 2 Star Member
- Posts: 53
- Joined: Sun Jun 24, 2012 5:39 pm
Re: marking pirece points
thanks for replies,
I got the job done. I did it kinda round about.
I wasn't making holes I guess that is why I couldn't get the drill operation in sheetcam to work. I needed the start points marked cause I was cutting 3/4" steel.
I tried hitting f5 the second the torch fired to stop it let it run to the next pierce and fire hit f5 and so on this worked pretty good but left the "nitride" what ever the word for that hard friggin crap is to drill.
So then I took a old electrode chucked it in the drill ground it to a point and put it in the torch without a tip and marked them with a sharpie no hard crap
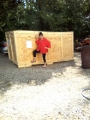
here is what I was working on it turned out pretty good was kinda interesting to get setup.
Pretty cool 30 pound emblem!!
goes on a 1950 willys truck
Again Thanks for the help.
Keith I would be interested in your gismo if i can figure out how the heck to use it. shoot me a email
I got the job done. I did it kinda round about.
I wasn't making holes I guess that is why I couldn't get the drill operation in sheetcam to work. I needed the start points marked cause I was cutting 3/4" steel.
I tried hitting f5 the second the torch fired to stop it let it run to the next pierce and fire hit f5 and so on this worked pretty good but left the "nitride" what ever the word for that hard friggin crap is to drill.
So then I took a old electrode chucked it in the drill ground it to a point and put it in the torch without a tip and marked them with a sharpie no hard crap
here is what I was working on it turned out pretty good was kinda interesting to get setup.
Pretty cool 30 pound emblem!!
goes on a 1950 willys truck
- wrench.jpg (40.25 KiB) Viewed 2919 times
- wrench.jpg (40.25 KiB) Viewed 2919 times
Keith I would be interested in your gismo if i can figure out how the heck to use it.
2X2 Shop built table,proma thc,TB6560 bob
TD cut master 52,SL 100 machine torch
mach3, sheetcam, 26cfm compressor, Ref.air dryer, water seperator, motorguard toilet paper filter
TD cut master 52,SL 100 machine torch
mach3, sheetcam, 26cfm compressor, Ref.air dryer, water seperator, motorguard toilet paper filter
-
CNCCAJUN

- 4 Star Member

- Posts: 1108
- Joined: Mon Dec 26, 2011 11:38 pm
- Location: Baton Rouge, LA
Re: marking pirece points
Impressive . . . I just gotta know how you were able to line that wrench up perfectly like you did.
I'm still new and have not figured this out yet.
I know I have a laser but I have not figured out a practical way to determine the relationship between the torch & the laser with any real accuracy . . .
Steve in Louisiana . .
I'm still new and have not figured this out yet.
I know I have a laser but I have not figured out a practical way to determine the relationship between the torch & the laser with any real accuracy . . .
Steve in Louisiana . .
Smiling Gator Metal Works, LLC
Dynatorch 4X4 XLS
PowerMAX 85
Baton Rouge, Louisiana
Dynatorch 4X4 XLS
PowerMAX 85
Baton Rouge, Louisiana
-
wilber
- 2.5 Star Member

- Posts: 147
- Joined: Sun May 11, 2014 8:23 am
Re: marking pirece points
bring the torch to pierce height fire it for a sec with the button then raise the torch to see if the cross hairs are correct. that is what i did.
*** DynaTorch Super B 4x8 with a Hypertherm Powermax 65****
-
danny
- 2 Star Member
- Posts: 53
- Joined: Sun Jun 24, 2012 5:39 pm
Re: marking pirece points
CNCCAJUN,
I used calipers to find center of each end of the "handle" part of the wrench and marked it. Then used the pointed electrode on the torch and ran the torch back and forth till I got it lined up then tacked some stops on the table to get it back where it was after I drilled the start point holes.
The handle is tapered so I had to taper the letters as well the "W" is 1.700 the "S" is 1.500. I zeroed on center then moved X -0.850 and re zeroed to make the cut.
Danny
2X2 Shop built table,proma thc,TB6560 bob
TD cut master 52,SL 100 machine torch
mach3, sheetcam, 26cfm compressor, Ref.air dryer, water seperator, motorguard toilet paper filter
TD cut master 52,SL 100 machine torch
mach3, sheetcam, 26cfm compressor, Ref.air dryer, water seperator, motorguard toilet paper filter
-
CNCCAJUN
- 4 Star Member
- Posts: 1108
- Joined: Mon Dec 26, 2011 11:38 pm
- Location: Baton Rouge, LA
Re: marking pirece points
Again, I say impressive . . . thank you . . .danny wrote:CNCCAJUN,
I used calipers to find center of each end of the "handle" part of the wrench and marked it. Then used the pointed electrode on the torch and ran the torch back and forth till I got it lined up then tacked some stops on the table to get it back where it was after I drilled the start point holes.
The handle is tapered so I had to taper the letters as well the "W" is 1.700 the "S" is 1.500. I zeroed on center then moved X -0.850 and re zeroed to make the cut.
Danny
Steve
Smiling Gator Metal Works, LLC
Dynatorch 4X4 XLS
PowerMAX 85
Baton Rouge, Louisiana
Dynatorch 4X4 XLS
PowerMAX 85
Baton Rouge, Louisiana
-
CNCCAJUN
- 4 Star Member
- Posts: 1108
- Joined: Mon Dec 26, 2011 11:38 pm
- Location: Baton Rouge, LA
Re: marking pirece points
What button . . . is there a radio button on the Dynatorch software that will fire the torch?wilber wrote:bring the torch to pierce height fire it for a sec with the button then raise the torch to see if the cross hairs are correct. that is what i did.
Steve
Smiling Gator Metal Works, LLC
Dynatorch 4X4 XLS
PowerMAX 85
Baton Rouge, Louisiana
Dynatorch 4X4 XLS
PowerMAX 85
Baton Rouge, Louisiana
-
wilber
- 2.5 Star Member
- Posts: 147
- Joined: Sun May 11, 2014 8:23 am
Re: marking pirece points
remember the one for the laser light? i think it is the 2nd or 3rd one. torch should be the first one. and fan is the 2nd or third.
*** DynaTorch Super B 4x8 with a Hypertherm Powermax 65****
-
beefy
- 4.5 Star Member
- Posts: 1503
- Joined: Fri Jan 18, 2013 3:19 am
Re: marking pirece points
Hi Danny,danny wrote:Keith I would be interested in your gismo if i can figure out how the heck to use it.
thanks for the interest but I've kind of lost heart in the project. I can't get enough interest (plenty opposition though) to even go ahead and manufacture a small quantity of PCBs. That only leaves me doing DIY one by one manufacture and that puts the price up more than what I envision anyone wanting to pay for a homemade circuit board.
If I ever have some spare cash and time to "play", I may look at marketing the PCB again but for now it's just been an exercise in futility.
Keith.
2500 x 1500 water table
Powermax 1250 & Duramax torch (because of the new $$$$ync system, will buy Thermal Dynamics next)
LinuxCNC
Sheetcam
Alibre Design 3D solid modelling
Coreldraw 2019
Powermax 1250 & Duramax torch (because of the new $$$$ync system, will buy Thermal Dynamics next)
LinuxCNC
Sheetcam
Alibre Design 3D solid modelling
Coreldraw 2019
-
danny
- 2 Star Member
- Posts: 53
- Joined: Sun Jun 24, 2012 5:39 pm
Re: marking pirece points
Thanks cnccajun, it was purely the good lord taking care of it. I just got to go along for the ride.
Keith was I correct about the drill operation dose it have to be holes or was i doing it wrong.
thanks Danny
Keith was I correct about the drill operation dose it have to be holes or was i doing it wrong.
thanks Danny
2X2 Shop built table,proma thc,TB6560 bob
TD cut master 52,SL 100 machine torch
mach3, sheetcam, 26cfm compressor, Ref.air dryer, water seperator, motorguard toilet paper filter
TD cut master 52,SL 100 machine torch
mach3, sheetcam, 26cfm compressor, Ref.air dryer, water seperator, motorguard toilet paper filter
-
tcaudle
- 4 Star Elite Contributing Member

- Posts: 1502
- Joined: Tue Feb 28, 2012 6:47 pm
Re: marking pirece points
Not to add insult to injury but the latest advanced POST for SheetCAM and the DTHCII/DTHCIV has soft "peck" using a "drill" tool. It short cycles the torch on. On the first pierce it raises up and does a quick fire to start purge air then does the other "pecks" You can define the peck height and the peck duration and using a Drill it self centers on the holes. If you have a Hypertherm with the RS485 option you can use our HyT-Connect RS485 upgrade to actually change the cut current from the G-Code using the same set of POSTS. SheetCAM POSTS are free for the listed THCs
TOM C
TOM C
-
beefy
- 4.5 Star Member
- Posts: 1503
- Joined: Fri Jan 18, 2013 3:19 am
Re: marking pirece points
Hi Tom,
no insult added, quite the opposite. I love reading your posts and every time I see your name on a post I jump straight to it to see what I can learn. Your idea of the dummy fire never occurred to me for instance. In any case, although Candcnc & Plasmacam have a similar system for marking whole centres to what my PCB achieves, there's still a great many tables out there that don't. So a potential market still exists. Plus what I've learned is invaluable for me. I can now design a PCB from an electronic schematic, build it at home with the ultraviolet exposure method, and drill in on my plasma table. Then I've learnt the basics of programming a microcontroller chip in C. All that because I wanted a better method of marking hole centres LOL. It's all a good tool to add to my workshop, and I love tools. Not only can I build something mechanically but I have the potential to add personalised control to it.
I'm certainly looking forward to when I can afford to upgrade from my present MP3000 to your latest system, so I wonder if you can explain the operation of your advanced POST a bit more. Maybe I won't need my hole marking PCB when I have your latest gear.
If I understand it correctly, in order to get a nice little divot in the top of the metal (the peck / hole mark) your system sends out a short duration "torch on" signal WHILE post cut air flow is ON. That is the post cut airflow is a pre-requisite for the timing period. So in order to start the post cut airflow the torch does a short dummy fire in mid-air. Then for the "peck" marking, the "torch on" signal duration allows for the post cut airflow to stop, the nozzle/electrode to re-contact, and the arc to re-ignite for a duration long enough to give the desired mark in the metal surface.
What are the "logic" conditions under which you get the dummy fire. For example if a cut has just finished then a hole centre needs to be marked, does the system automatically do a dummy fire even though the post cut airflow is still on from the previous cut. Or said another way does the dummy fire happen religiously before a new hole marking operation.
Take the following example: if I had a nested cut of parts with a single hole in each one. I want to mark the hole (peck) then cut, then do the next part the same. So peck then cut, peck then cut, until all finished. Seeing as there is a cut between each peck / hole mark would the torch do this dummy fire every time. Each torch fire is wear on the consumables so in this example the number of torch fires would be doubled (IF the dummy fire happens before each peck).
The main issue I had with Mach doing the timing was inconsistency of the timing period or I simply couldn't get a short enough "peck" duration. But then again I was doing the opposite to your method and firing the torch with no air flowing, so I needed a shorter "torch on" signal duration.
I've heard something about your latest system removes all the timing from Mach and it's now done in an external box. Is that correct. All this is making my MP3000 look really old and outdated.
Thanks,
Keith.
2500 x 1500 water table
Powermax 1250 & Duramax torch (because of the new $$$$ync system, will buy Thermal Dynamics next)
LinuxCNC
Sheetcam
Alibre Design 3D solid modelling
Coreldraw 2019
Powermax 1250 & Duramax torch (because of the new $$$$ync system, will buy Thermal Dynamics next)
LinuxCNC
Sheetcam
Alibre Design 3D solid modelling
Coreldraw 2019